

Before you start
- A DJ interface. Dub records only through a DJ interface, never the Mac’s built-in input, so the rip sounds like your rig. It records the turntable on deck A’s input.
- Vinyl recording on. Turn on Vinyl recording in Preferences ▸ Vinyl. The top bar then shows the PREP · REC · PERF switch.
- Microphone access. macOS asks once. If you said no, enable Dub under System Settings > Privacy & Security > Microphone.
Record a side
1
Press REC
Click REC in the top bar. Dub switches to Prep and arms: the bar
says ARMED and drop the needle, and the level meter is already
live. CANCEL backs out; nothing has been recorded yet.
2
Drop the needle
Recording starts by itself when the music starts. The second before
the trigger is kept, so the drop is in the rip. The bar shows REC,
the running time and the meter.
3
Watch the level
The bar is the average level; the thin marker is the peak. If the take
hits full scale, the meter turns red and CLIP shows for a moment.
4
Let the side end
Dub stops by itself in the run-out groove and says
Side ended — stopped in the run-out. You can also press STOP
at any time. A recording stops at 40 minutes whatever happens.
The playing waveform stays empty while a rip records. Only the overview
shows the signal. This is a known issue.
Review the side
When recording stops, the whole side is loaded on deck A as one track and the review panel takes the place of the hot cues and samples.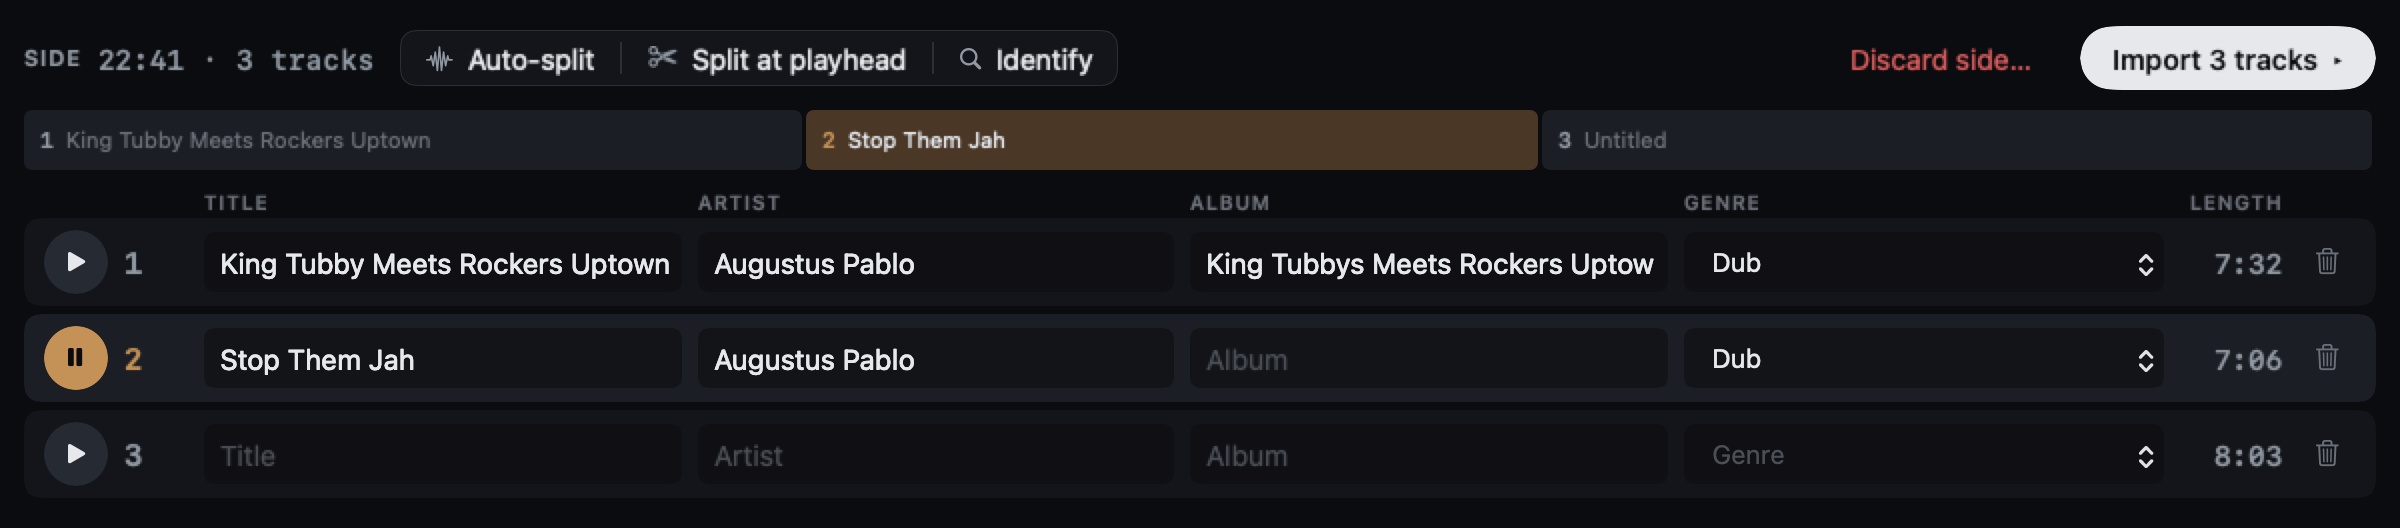
Split it into tracks
- Auto-split finds the gaps between tracks and places the splits. It also trims the lead-in and run-out grooves off the ends. If it finds no gaps, place the splits by hand.
- Split at playhead adds a split where deck A is now.
Each track has to be at least 5 seconds long. Each split is labelled with
the name of the track that starts there, once you’ve typed one.
The lead-in and run-out
The grooves before the music and after it are shaded on the overview, with a bracket at each end of the side. Drag a bracket to move where the side starts or ends. ⌫ on a bracket, or right-click and Keep the lead-in / Keep the run-out, puts that end back to the whole recording. The header shows how much is trimmed.Name the tracks
Under the track map, each track has a row: TITLE, ARTIST, ALBUM and GENRE, and its LENGTH. Type straight into the fields; the genre field offers the genres already in your collection. Click a block on the track map, or a row’s play button, to hear that track. A piece under 20 seconds at the start or end of the side is probably the lead-in or the run-out. Its row says Lead-in? Leave out or Run-out? Leave out; click it to leave the piece out.Leave a track out
The bin at the end of a row leaves that track out of the import. The audio stays in the side archive, and Put back brings the track back.Import
Press Import 3 tracks ▸ (the button counts the tracks you’re keeping). Each track is encoded and the rows show their progress until the panel says IMPORTED. What you get:- A 24-bit FLAC per track, tagged with title, artist, album and genre, plus BPM and key (Camelot), so the tempo and key travel with the file into Serato, Traktor or rekordbox.
- Analysed on import: beat grid, key, loudness and waveform are done, and the tracks are in your library like any other file.
- The whole side, kept losslessly as
side.flac, so you can split it again later without playing the record.
~/Music/Dub/Rips/, one folder per side.
If a track fails, press Retry failed. Tracks already imported are
skipped.
Discard side… throws the recording away. Click it twice: the second
click asks Really discard the side?
Leaving a rip
PERF is greyed until you finish or leave the recording.
After a crash
Dub writes the recording to disk as it goes. If Dub quits mid-rip, or you leave a side in review, Prep shows a row such as Unfinished rip — 22:04 recovered the next time you open it.- Review reopens the side at the review panel.
- Later hides the row for now. It never deletes the recording.
Split a side again
Every side you’ve imported is listed under Real Records in the library, newest first, with its length and track count. Press Re-split and then Really re-split? to open it in the review panel again, from the lossless archive. Your new tracks import first; the old ones leave the library only once that has worked. Right-click a side for Reveal in Finder. Re-splitting works only in Prep, and only when no other rip is open.Identify the tracks
Identify asks AcoustID for the artist and title of each track. It’s the only part of ripping that uses the internet, and you have to set it up in Preferences ▸ Vinyl first:
Found names show in amber in each row. Nothing is written until you take
it: click Use in a row, or Use all for every track. The panel says
how many it named, for example Named 2 of 3, or
No match — not in the database.